Step 1. Login to Webmail. Step 2.Click your email address in the top-right corner, then click 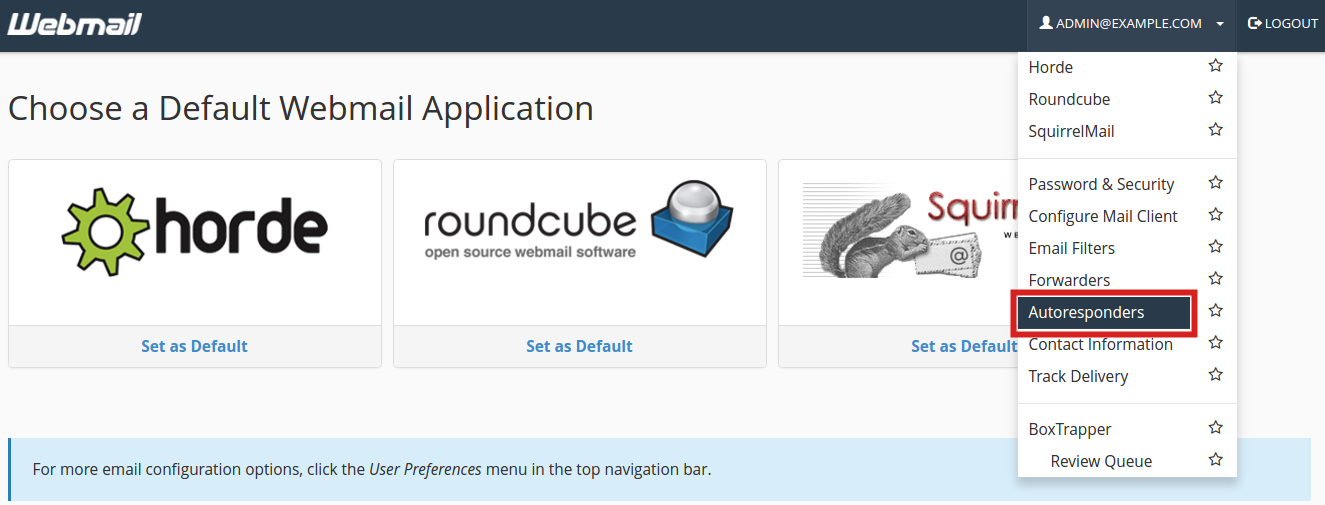 You will then be on the Auto Responders page. Any existing Email Forwarders will be listed. Step 3. Click the Add Auto Responder button. 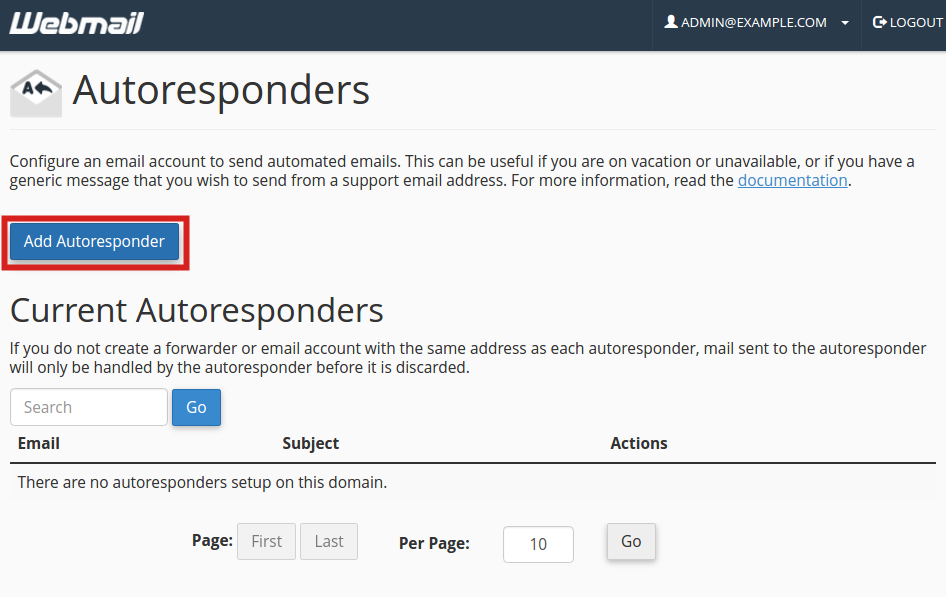 Step 4. You will now be able to fill in the fields to setup your AutoResponder. Below is a brief description of the available options. | Option | Description |
|---|
| Character Set | The standard Character set is “utf-8,” but you can change it here. | | Interval | Here you can set how many hours to wait before autoresponding to the same email address. | | Email | This will list the email address you are setting up the autoresponder for. | | From | You can enter a “From” address here. I recommend using the same address you used in the Email field. | | Subject | Enter a subject line here. For example: “John is out of the office.” | | HTML | Check this if you want to enter HTML into the “Body” of your email. | | Body | Enter your Autoresponder message here. | | Start | Choose if want this autoresponder to begin Immediately or set a Custom start time. | | Stop | Here you can set a Custom date for your Autoresponder to stop responding, or set to Never |
Step 5. Click the Create/Modify button to save your changes. You are finished when you see a message stating “You have successfully created auto responder.“ |